ZFS volumes and VirtualBox
Testing OS releases with VirtualBox, ZFS, and FreeBSD is still one of those “that’s amazing” things for me. This post reprises two earlier posts (laptop inception and vzvol) with some succinct instructions. Trigger for looking this up again was a question about FreeBSD 12.3 compatibility for KWin.
As far as the KDE-FreeBSD team is concerned, FreeBSD 12 is “grudgingly supported”. While it is an officially supported FreeBSD release, it’s also part of the 12-series, which is missing a bunch of improvements that are relevant to the desktop experience and to upstream development. Graphics drivers, WiFi, simplicity of system headers, those are all significantly better in the 13-series. So, stuff breaking for FreeBSD 12 is likely to be handled with a
BROKEN_12in future, rather than significant patching effort.
Creating ZFS Volumes
The command zfs create is used to create ZFS datasets. No surprise there. With the -V option, a volume
is created rather than a regular dataset (e.g. a filesystem). So let’s create a 16GB volume on the pool called zippy (that’s a single SSD
scratch drive attached to my system; the name isn’t important and your pool will probably be called something else).
zfs create -V 16G zippy/freebsd12-test
Now there’s a /dev/zvol/zippy/freebsd12-test character device. This can be written to. For all intents
and purposes, it is a disk. The next step is to tell VirtualBox about the existence of this new disk. This is best
done while VirtualBox (the UI) isn’t running.
VBoxManage internalcommands createrawvmdk \
  -filename ~/VBoxdisks/freebsd12-test.vmdk \
  -rawdisk /dev/zvol/zippy/freebsd12-test
This creation part only needs to be done once. Now there’s storage, and VBox knows it as a disk. When a virtual machine (VM) uses this disk, it writes through to the backing storage. While the VM is off, the disk can be changed however you like (e.g. dropping a new OS image over top of it).
Writing OS Images
This can be done before, or after, the VM is created. Only overwrite the disk while the VM is off, or chaos will ensue.
I went and got the raw disk image
of a 12.3 release (in that directory, there is a raw.xz, which is the raw bytes, and there are vhd.xz and vmdk.zx and other
VM formats as well: because I’m using ZFS volumes, these VM-specific formats are not needed now). Expand the data and write
to the disk:
xzcat FreeBSD-12.3-RELEASE-amd64.raw.xz > /dev/zvol/zippy/freebsd12-test
Creating a VM
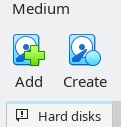
Start VirtualBox. Go to File > Virtual Media Manager, check if the new disk (called freebsd12-test here)
is listed. If not, click the Add icon, navigate to where the disk .vmdk is located (in the example command above, in ~/VBoxdisks/),
select it and click Open to add the ZFS volume to the list of disks.
You only need to do this once, for a new volume.
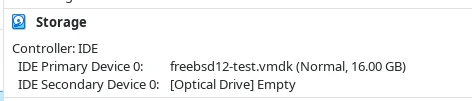
In VirtualBox, create a new VM. Give it some memory (1GiB is suggested, I tend to bump it up to 8GiB and 4 CPUs, as well as tweaking the display settings). When prompted for the disk, choose existing disk and pick the disk corresponding to the ZFS volume.
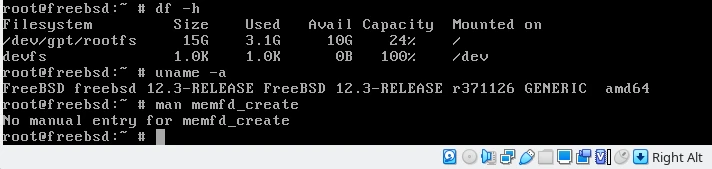
The VM boots from the assigned disk, which is whatever you want. In this case, it’s
a fresh FreeBSD 12.3 image. The VM image auto-resizes to the size of the physical disk
on first boot, so here’s the 16GB result (and no memfd_create() in 12.3, which is the
reason I needed this to check).