VirtualBox with FreeBSD + KDE
I have this instant-workstation script that can be used to turn a fresh FreeBSD install into a working KDE desktop machine. I don’t run it that often, because I don’t (re)install that many machines. However, people on the Twits do seem to have trouble making similar steps, and so I’m writing down a full story from virtual machine (VM) creation to KDE Plasma Desktop.
This kind of story has its place also in the documentation (e.g. one of the FreeBSD Handbooks) and the wiki (e.g. on KDE community) but my energy gets used up just for writing this down, not wrangling it into various formats.
VM Creation
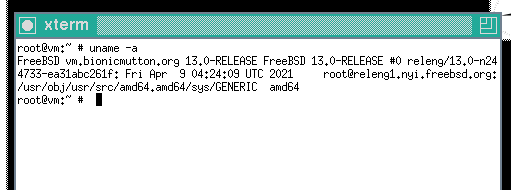
I’m using VirtualBox 6.1.22. The host machine is also a FreeBSD machine, but I don’t think that should make much of a difference.
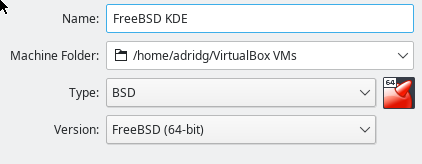
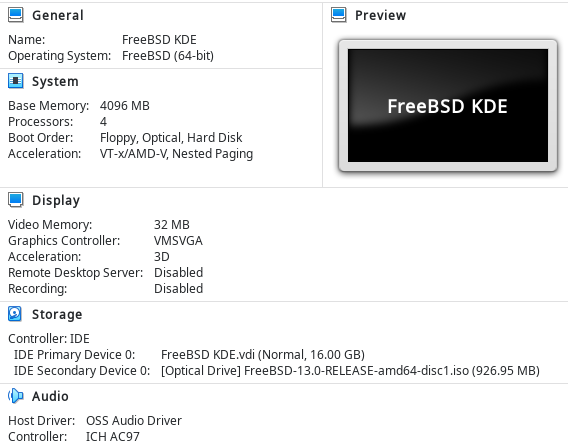
Let’s start with the creation of a VM, calling it FreeBSD KDE. I gave the VM 4096MB of RAM (not the default) and created a new virtual hard disk of 16GB (default). I used the default VDI image type, dynamically allocated – so all except for the RAM size was the default.
Then I tweaked the VM settings:
- Under System > Motherboard, leave everything default: PIIX3, PS/2 mouse, no EFI. This is an old-school VM.
- Under System > Processor, bump up the CPUs to at least 4. No need to be that old-school.
- Under Display > Screen, bump the video memory up to 32MB. Leave the graphics controller set to VMSVGA, but enable 3D acceleration. The host system has an AMD Radeon R7 360, I have no idea if that helps.
After clicking OK, in the overall VM manager screen I put a virtual CD into the virtual CD drive. I have gobs of ISO images downloaded for Calamares and other testing, so I had a 13.0-RELEASE disc at hand.
The VM is ready to go, so let’s boot and install FreeBSD. Oh boy! Text-based installers! My favorite!
FreeBSD Installation
I won’t walk through the whole FreeBSD installation process. I did not install kernel-debugging or 32-bit-compatibility, I picked Auto UFS and entire disk and MBR (did I say “old-school” recently?) for the disk setup. For this VM I’m not interested in any fancy disk layouts.
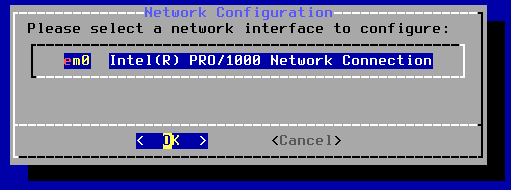
Networking is IPv4 only for this VM, using DHCP, I picked Europe/Amsterdam as a timezone, and disabled sshd and dumpdev in the system configuration. I’m not going to SSH to this thing, the VM console and keyboard are virtually physically right here. I did no system hardening. The typical ones, like randomize PIDs do not have any effect on KDE once it’s running. I added one user, d. That’s short for “David”, because of the number of Davids in KDE (I am not aware of a cabal of Davids in FreeBSD).
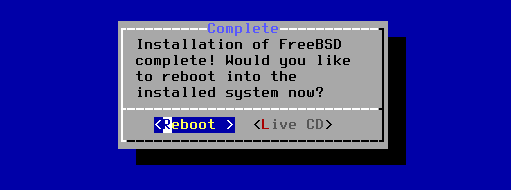
The installation is complete. I can power off the VM, remove the virtual CD, and then boot it up again.
Software Installation: X11
After a reboot, we end up with a “clean” FreeBSD installation. The base system is there, but there is no additional software. Not even a package manager!

We can bootstrap the package manager by logging in as root.
Then run pkg. The package manager is called pkg, but the
pre-installed one is just a bootstrapper for the real thing.
At this point, it also becomes clear if the installed VM
can find the network and has properly configured DNS and routing.
If all goes well, a new pkg is downloaded from the FreeBSD package
library, its signature verified, and you’re ready to go.
Let’s get X11 up and running first, with twm and xterm as a way of exercising that. I just want to know that the graphics drivers can possibly work.
pkg install xorg twm xterm
That represents 184 packages and 1GiB of space on disk. Once that is
done installing, run startx (as root! eww!) to start an
old-school X11 session. It’s just like being at a Sun SPARCStation IPX
in 1994 except there’s color graphics.
To get out of twm, type exit in the left-most of the three xterms.
Or in all of them, one-by-one, until the screen returns to text mode.
Software Installation: Display Manager
Next, let’s install a display manager. Since the eventual goal is a KDE Plasma Desktop experience, the display manager of choice is SDDM: Qt-based, themeable, good KDE integration.
pkg install sddm
This is another 28 packages, pulling in parts of Qt, etc. A fresh FreeBSD installation will use the “quarterly” packages. These are – the name says it all – basically stable packages across a calendar quarter. Since I have since broken all kinds of things, including SDDM, in the unstable packaging, this is a good thing.
See PR 256870 for an example of how stuff is sometimes broken. It should be fixed by now. It’s a hidden problem in this VM because
xorgpulls inxorg-appswhich includesxauth.
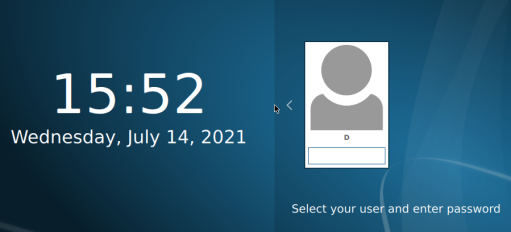
To test SDDM, we can start it “just once” with the command service sddm onestart.
It comes up with the most default of all possible login screens (screenshot is scaled).
I can login as d, but because there’s no user session defined for d,
(that user does not have a .xsession file), nothing gets started.
Black screen and no way to get out. An ACPI shutdown of the VM is graceful,
and starting the machine after that gets back to the text login screen.
Software Installation: KDE Plasma
To get KDE Plasma – that is, the desktop shell without KDE Applications,
etc. etc. – the name of the package is plasma5-plasma-desktop, and it will
pull in an additional 285 packages (lots of multimedia, breeze, oxygen-icons,
the rest of Qt, gtk2 and gtk3). This is a “metaport” which is our
code name for “package that pulls in lots of others in some sensible
default configuration”. Why does that include gtk2 and gtk3? Well,
because of the “full features” philosophy: KDE systemsettings has
a control module (KCM) for configuring GTK-based applications, but
needs the underlying libraries to do that. (Edit: actually it’s plasma5-plasma
that is the metaport; that would pull in screen-management and sound-support,
and is probably the better choice to install)
Slimming down dependencies is an on-going project. On the packaging front there is work on “subpackages” which may make it much easier to slim things down. For now, though, we need to accept that the default package builds are fairly “fat”.
pkg install plasma5-plasma-desktop
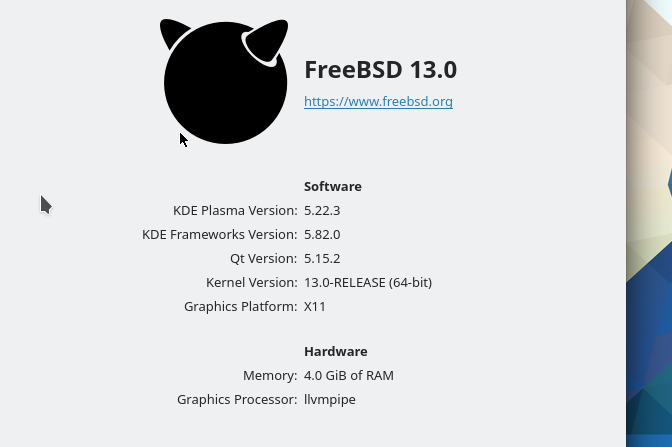
After KDE Plasma is done installing, SDDM can be started again. Notice that it now picks up a different theme for the greeter, and the available desktop sessions have expanded to User Session, Plasma (X11) and Plasma (Wayland). Our user d does not have a user session (as we noticed earlier) and Wayland isn’t going to work in this VM (not with what has been installed so far, anyway). Sticking to X11, we can log in and get a KDE Plasma desktop.
There are some little issues with such a bare desktop: the panel comes with links to Discover, Dolphin (or, rather, the default file manager) and Falkon (or, rather, the default web browser), but none of those have been installed. So there’s “missing application” icons instead.
On the other hand, Qt designer is installed because it’s a dependency of something-or-other. That’s what I mean by “the dependencies are fat”.
Further Steps
Now that we know that user d can get a KDE Plasma Desktop, let’s wrap up some system-configuration items.
- We can add a browser and a file manager with
pkg install dolphin falkon.. this is another 560MB or so, because it starts with WebEngine and some more KDE Frameworks, but also Akonadi (because of .. accounts integration, maybe? Feel free to investigate and file a PR) and therefore MySQL server. - We can make the system bring up SDDM by default with
sysrc sddm_enable=YES. - From SDDM, we can’t shut down the system – the sleep, restart and shut down
buttons are all disabled. The reason for this is a bit derpy:
SDDM wants to talk to ConsoleKit for that kind of functionality.
For that, it needs to have a system DBus service running, and that’s
not enabled – not by merely installing SDDM, anyway. So we can
switch that on and know that after reboot, we can shut down from SDDM.
Use
sysrc dbus_enable=YESfor that.
From this point on, it’s a fairly normal desktop system. There’s even a web browser, to help DuckDuckGo for more solutions or to visit the IRC channel.